Night Train Masterpiece
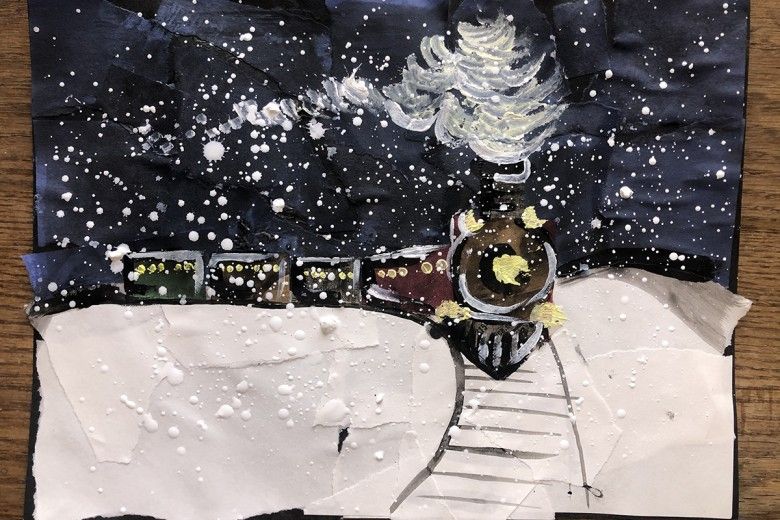
ALL ABOARD! I think I see lights coming closer. . .it’s hard to see through all that thick snow, but it looks like a bustling train! Gather up some old scrap paper and join us in making a mixed media collage made of simple shapes featuring a train traveling on a very snowy night. It sure is getting cold out there, wouldn’t it be nice to watch the snow whizzing by out a train window while sipping hot cocoa?
Gather Your Supplies:
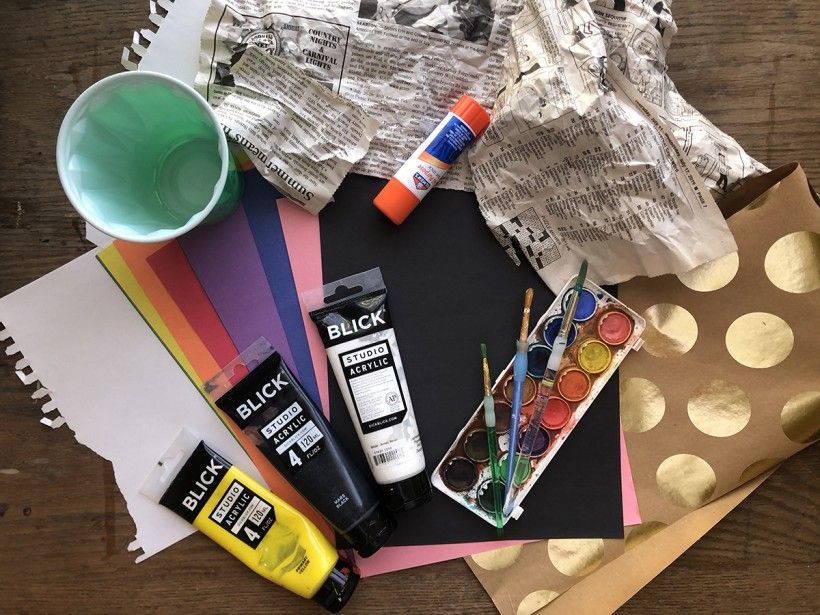
You will need:
- A variety of scrap paper (newspaper and wrapping paper were my go-to picks)
- Black, blue and white construction paper (other colors are optional)
- Black, white and yellow paint (I used a mixture of watercolor and acrylic, but any type of paint would be just fine)
- Glue
- Water cup
- Paintbrushes and/or Q-tips
- Scrap cardboard for mixing paint
Step 1:
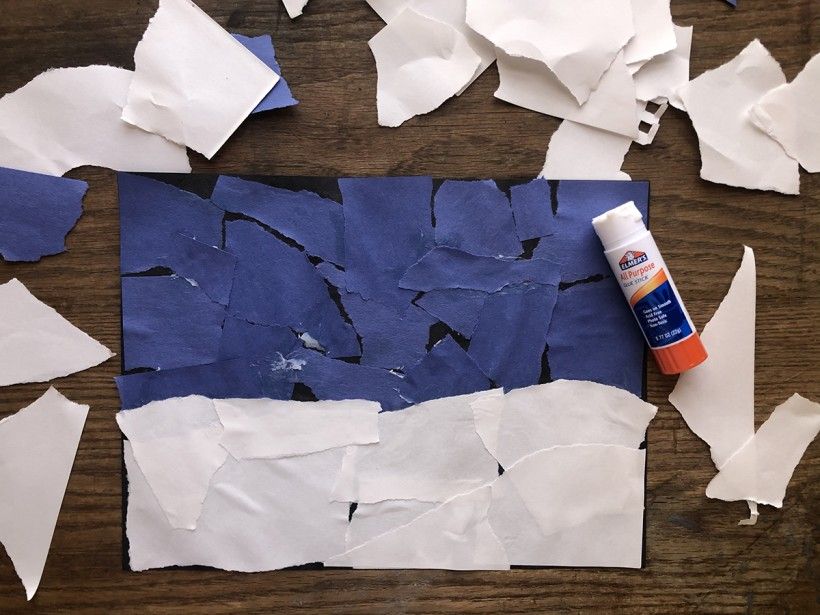
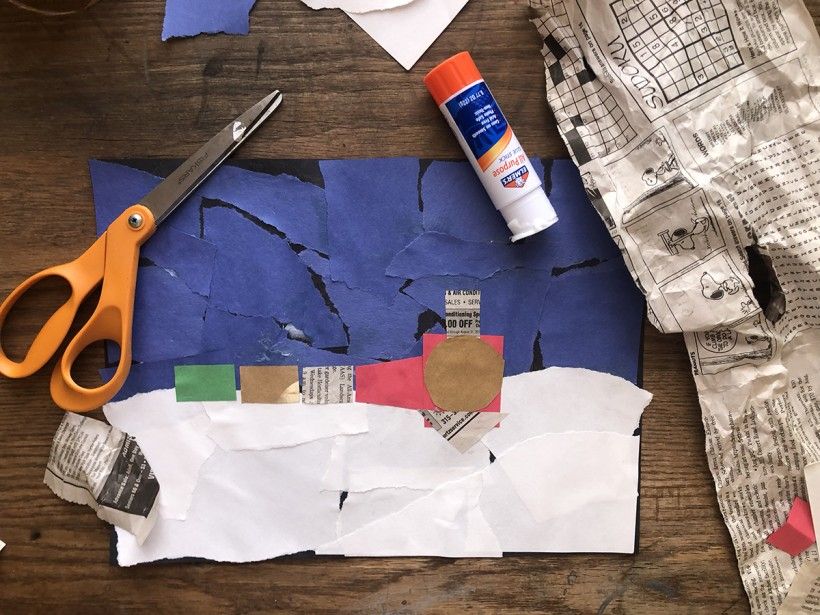
This scene takes place on a snowy night! Start by ripping up white and blue pieces of construction paper into various organic shapes and sizes. Then you’ll want to fit, layer and glue your organic blue and white shapes onto black paper. The top half should be dedicated to blue paper and the bottom half should be white. Be sure to leave some of the black paper showing to allow more color variation and texture. This will make your final scene more interesting!
Pro tip: An organic shape is a form that can’t be identified as a circle, square, rectangle etc.
Step 2:
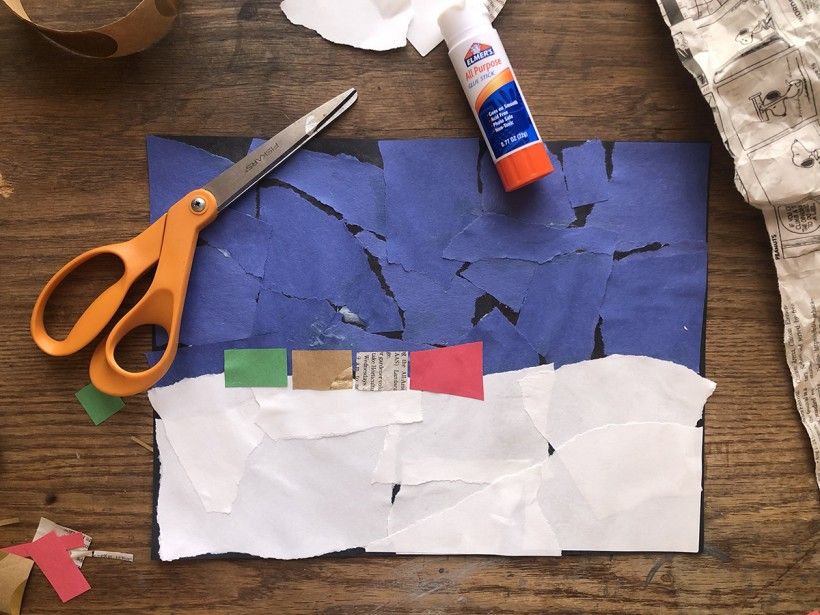
Cut several small rectangles and one trapezoid (my trapezoid is the red shape in the photo; it’s sort of shaped like a lampshade) out of the different kinds of paper that you gathered. I used wrapping paper, newspaper and construction paper. Glue them in a row where the sky meets the snow with the large end of your trapezoid leading the way.
Step 3:
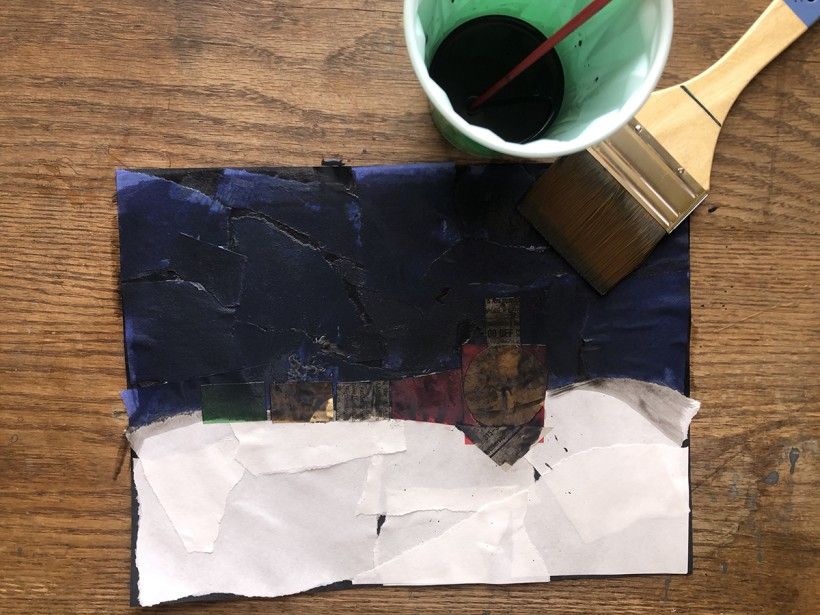
Cut four different geometric shapes (triangle, square, circle and rectangle) and arrange them to look like the front of a steam engine and then glue them next to the large end of your trapezoid. Be sure to cut these geometric shapes larger than the rectangles you cut for the cars of your train—this will make it look like the train is getting closer and closer!
Pro tip: A geometric shape is a form that can be identified such as a triangle, circle, or square.
Step 4:
Remember, this is a snowy nighttime scene, so we need to darken the sky a bit. Mix black paint with lots of water making it thin and see through and then brush it over everything in your scene, except the snow—this is called a wash!
Pro tip: Make sure your black paint is very thin; the goal is to make it look a little darker, not completely cover it.
Step 5:
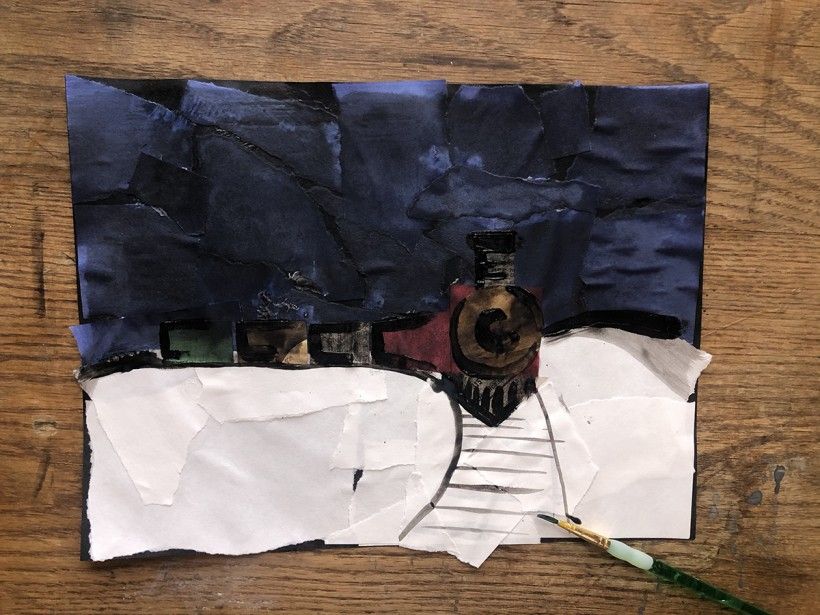
Use black paint and a thin brush to add details to your train scene. I started by outlining the shapes of the train and engine and then added a track. Notice how the track gets wider the closer it gets to the bottom of the page. This is called perspective!
Step 6:
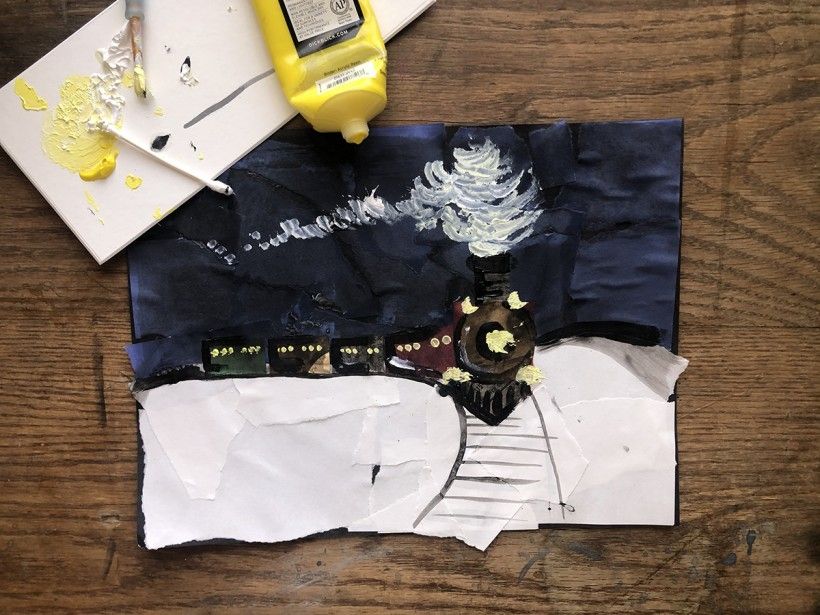
Mix your yellow and white paint and add small dots to the cars and larger circles to the front of the engine for windows and lights. Add a little bit more white paint into your mixture and paint the steam coming out of the top of your engine.
Pro tip: Similar to how you made the track wider at the bottom of your paper, you can make the stream of steam and the windows on the train smaller as they get farther away from the engine.
Step 7:
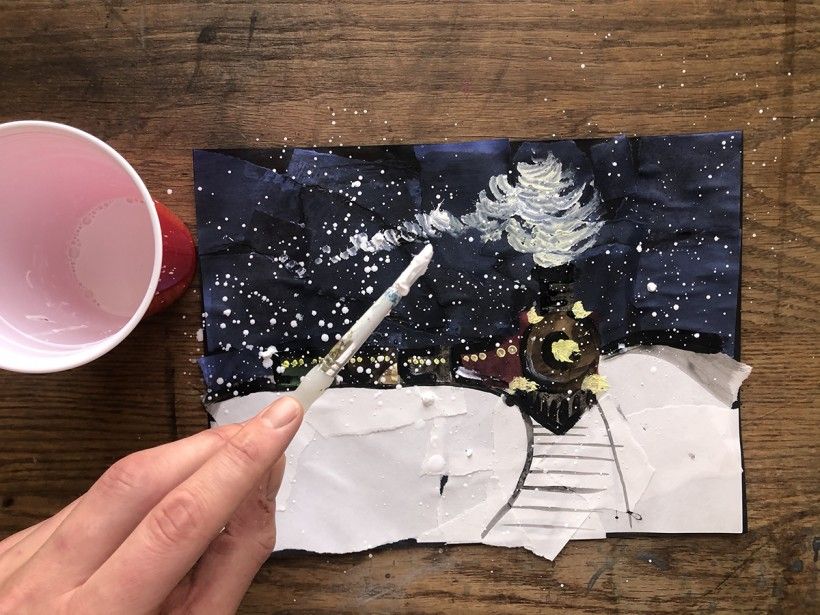
Mix white paint with water to make it very thin. Hold a paint-filled brush over the top of your painting and tap your hand to splatter the paint. . .think snow globe!
Step 8:
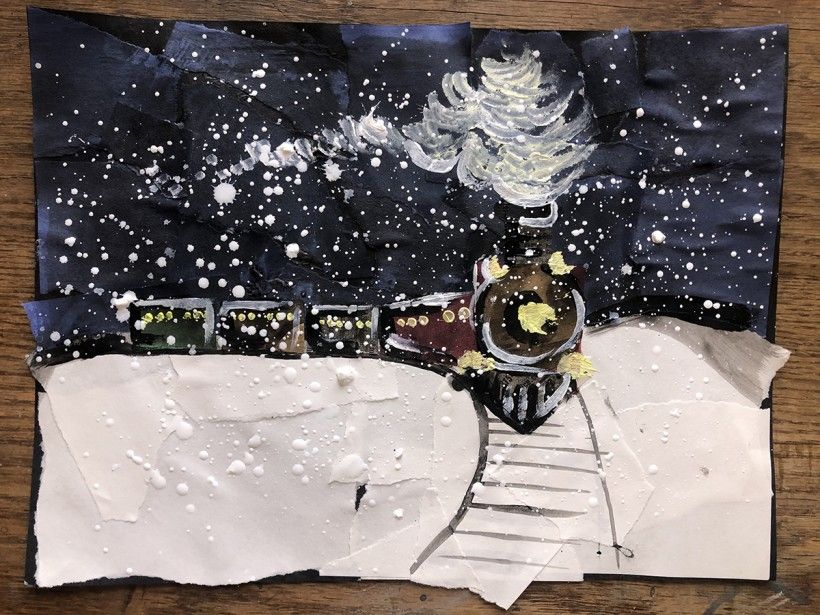
Use white paint to highlight some of the details of your train and engine. This step is like what you did to add details with black paint in step 5.
Future Fun: Perspective is a fun way to give your work dimension. What other things can you add to your mixed media painting while experimenting with size to make them look close or far away? Large trees at the bottom of your paper versus small trees behind the train are a great start.